
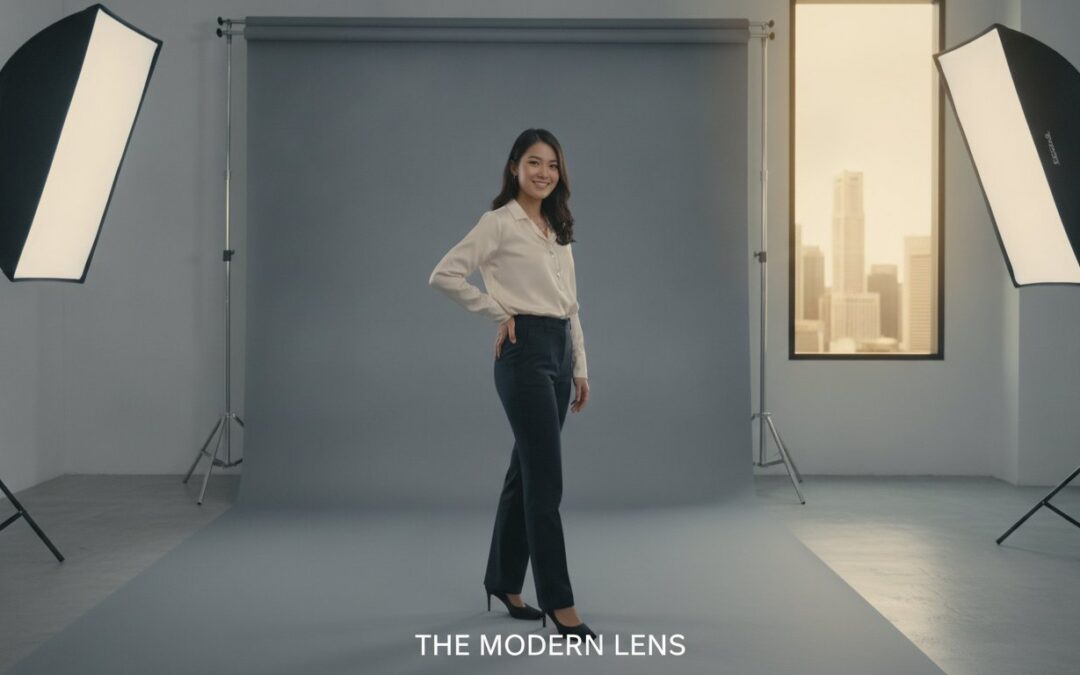
What if the secret to a stunning photo wasn’t your outfit or the lighting, but simply how you distribute your weight? Most people in Singapore feel a wave of anxiety the moment a camera lens points their way. It’s completely normal to worry about where to put your hands or how to avoid a double chin. You want to look your best, yet the pressure to perform often leads to stiff, unnatural results.
We believe that great photography is a repeatable system of angles and posture, not an innate talent. This guide will help you eliminate camera awkwardness and master the most flattering family portrait poses for your 2026 session. You’ll learn professional techniques to look slimmer, feel more confident, and finally understand exactly what to do with your hands. From subtle chin tilts to the clever use of studio remotes, we’re providing a clear roadmap to ensure your next photoshoot is a seamless and successful experience.
Key Takeaways
- Learn why camera shyness is a natural response and how a private studio environment helps you shed performance anxiety.
- Master the “Big 5” universal rules, such as weight shifting and creating arm gaps, to perfect your family portrait poses for any occasion.
- Discover specific techniques for handling bulky outfits, including graduation gowns and traditional Hanbok, while maintaining a slim and defined silhouette.
- Gain confidence using studio remotes with the “Click and Hide” method to capture professional results without visible equipment.
- Understand how a dedicated space provides the high-end lighting and privacy needed to practice these techniques effectively.
The Psychology of Posing: Overcoming Camera Shyness in 2026
Feeling a sudden wave of stiffness the moment a camera points your way isn’t a personal flaw; it’s a universal human response. Psychologically, being observed triggers a performance anxiety that makes us hyper-aware of our limbs and facial expressions. This is especially true when attempting complex family portrait poses. When you understand that nearly everyone feels this way, you can begin to dismantle the pressure to be perfect and focus on the experience instead.
One of the most effective ways to bypass this anxiety is the private studio advantage. Traditional photography involves a stranger directing your every move, which can feel invasive or clinical. By choosing a self-photo studio, you remove the social pressure of being “watched” by a professional. This privacy allows you to experiment with different angles without judgment. Before you begin, it helps to understand what is a photo shoot in a modern context, as it has evolved from a rigid, directed event into a flexible, creative session. Visualizing the final high-quality print on your wall helps guide your expressions toward warmth and authenticity rather than a forced grin.
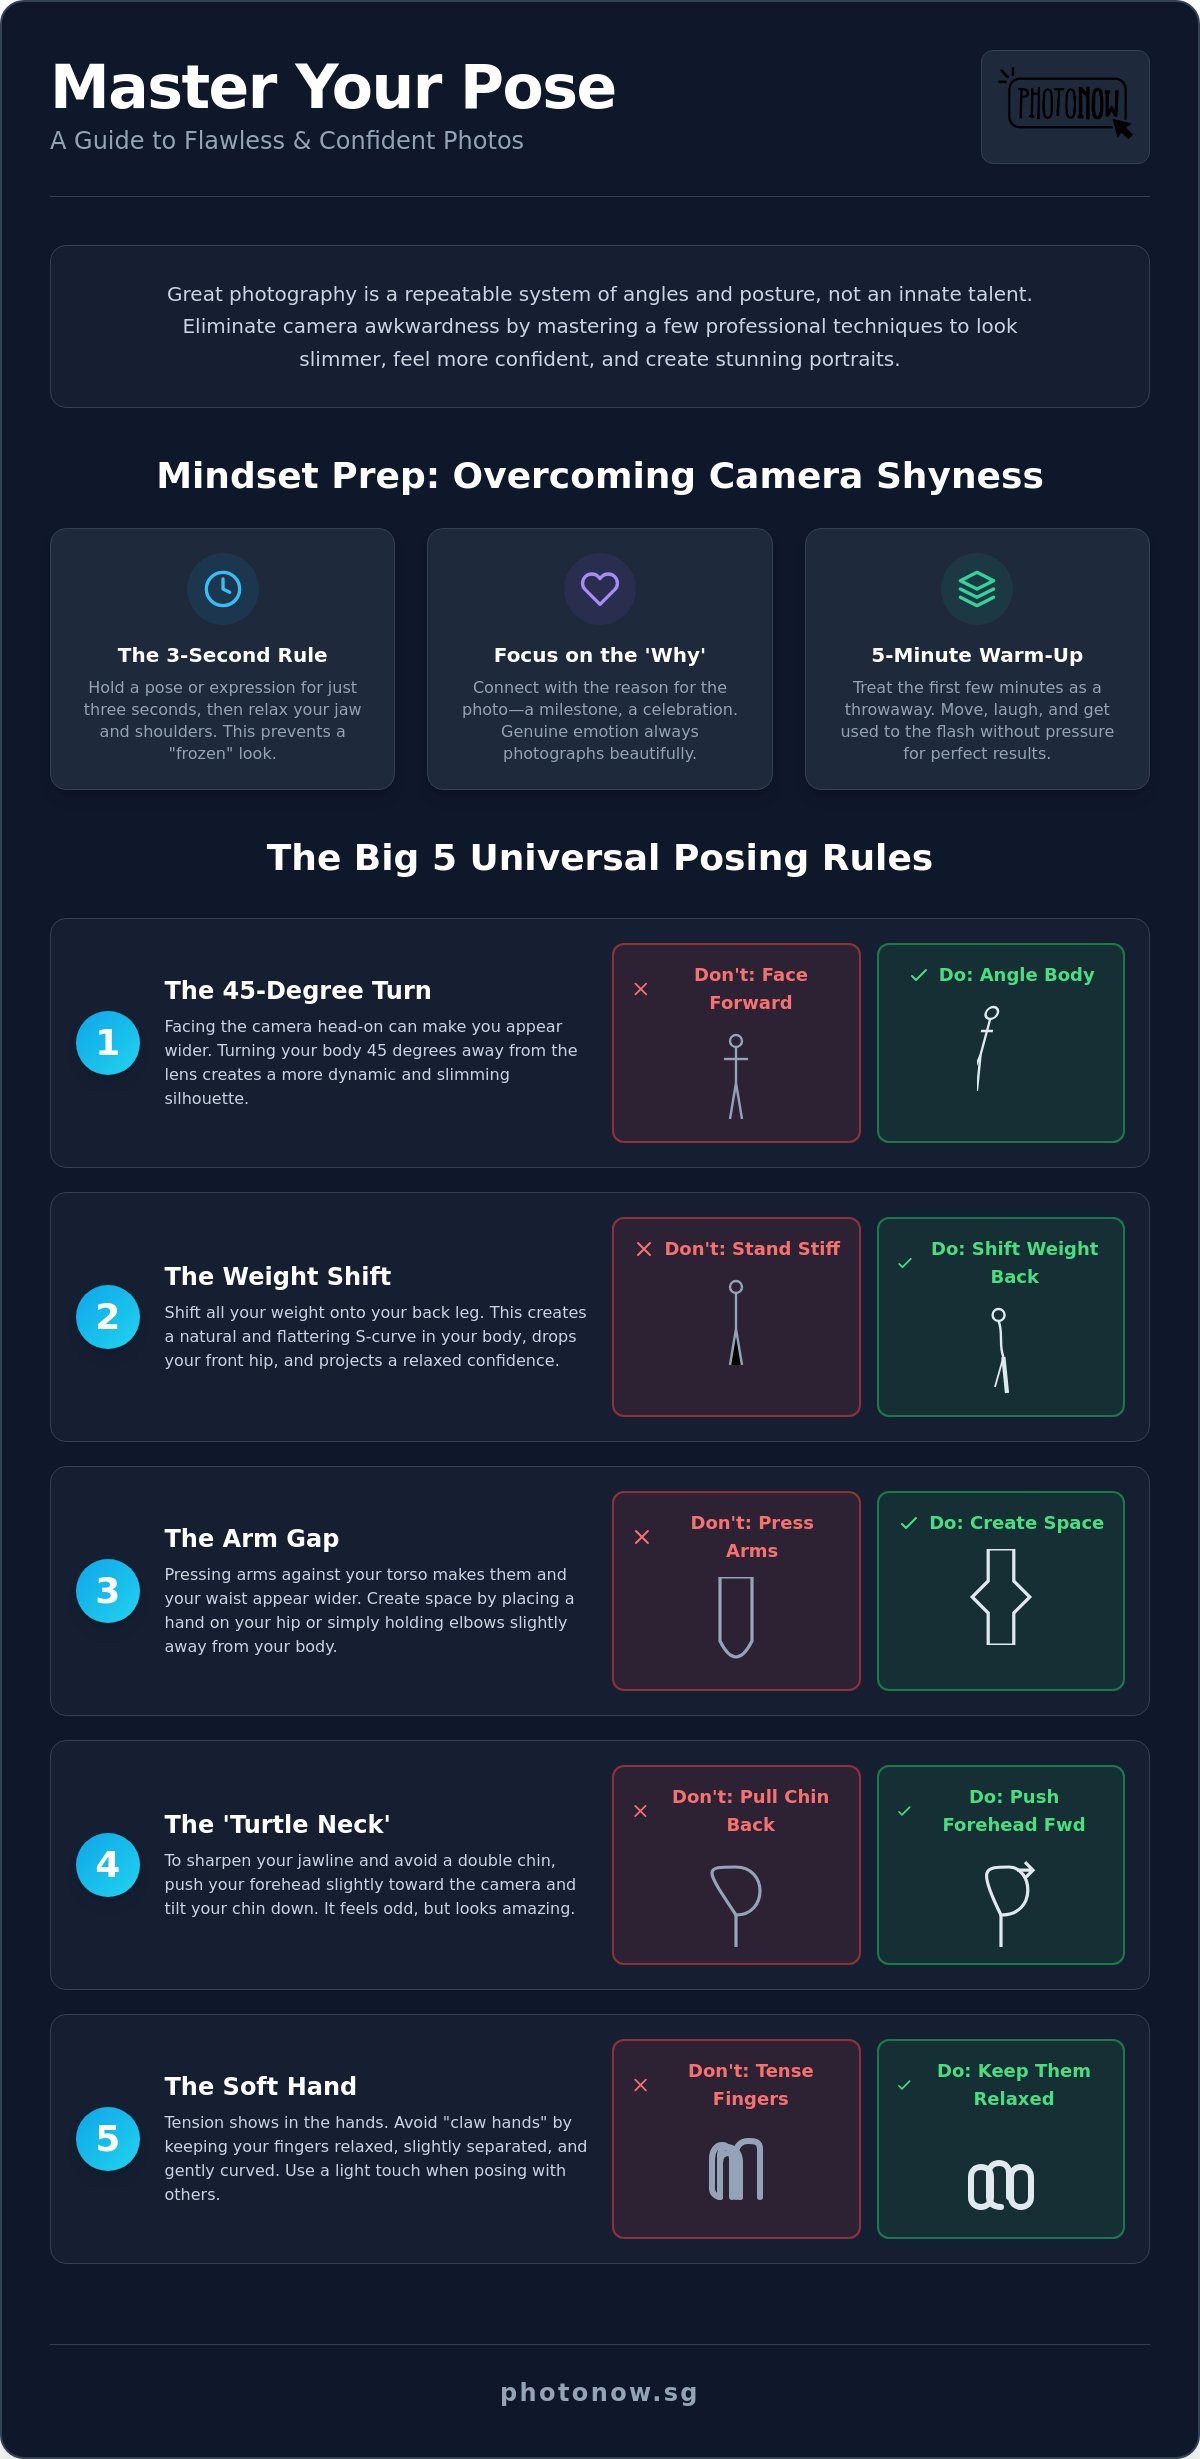
To keep your face looking fresh throughout the session, use the Three-Second Rule. Hold a specific pose or expression for three seconds, then consciously relax your jaw and shoulders before resetting. This simple reset prevents the “frozen” look that often happens during longer blocks of shooting time.
Mindset Shifts for a Stress-Free Session
Shift your focus from how you look to why you’re there. Whether it’s a graduation, a new addition to the family, or an anniversary, focusing on the milestone drives genuine emotion. We recommend treating the first five minutes of your booking as a throwaway warm-up. Don’t worry about the results during this time; just move, laugh, and get used to the flash. A professional studio environment provides a secure, private pod where you can be yourself without any outside distractions.
The Power of the Mirror Effect
Modern self-photo studios use live view monitors to create a “mirror effect.” This provides a real-time feedback loop, allowing you to adjust your family portrait poses instantly. However, be aware of the “mirror lie.” We’re used to seeing our reflection, which is flipped, so the actual photo might feel slightly different at first. To combat this, practice micro-expressions, like a slight squint or a specific chin angle, in a mirror at home. By the time you reach the studio, these movements will feel like second nature, ensuring a seamless transition from practice to the final shot.
The Big 5 Universal Posing Rules for Every Body Type
Posing isn’t a mysterious gift reserved for professional models. It is a set of geometric principles that anyone can master. When you are coordinating family portrait poses, applying a few universal rules ensures that every family member looks their best regardless of their body type. These rules focus on creating flattering lines and avoiding the visual “flattening” that occurs when we face a camera lens directly.
Rule 1 and Rule 4: The Weight Shift and the 45-Degree Turn. Facing the camera flat-on often makes the frame look wider than it is. Instead, turn your body at a 45-degree angle away from the lens. Shift your weight onto your back leg. This simple movement naturally drops the front hip and creates a more dynamic, slimming silhouette. Understanding the nuances of body language in posing helps you project an air of relaxed confidence rather than appearing defensive or stiff.
Rule 2: The Arm Gap. Pressing your arms tightly against your torso flattens the muscles and makes the waist appear wider. You can solve this by creating “negative space.” Place your hands on your hips or keep your elbows slightly away from your body to define your midsection. Rule 3: The Turtle Neck. It might feel strange, but pushing your forehead slightly toward the camera and tilting your chin down elongates the neck. This technique eliminates the appearance of a double chin and sharpens your jawline instantly. Rule 5: The Soft Hand. Tension often shows in the fingers, leading to “claw hands.” Keep your fingers relaxed and slightly separated. If you are touching a family member, use a light, gentle touch rather than a firm grip.
Mastering the Lower Body
The “Red Carpet Lead” is a classic technique where you cross one foot in front of the other. This elongates the legs and adds a touch of elegance to any standing pose. When using studio stools, sit on the very edge rather than leaning back. This forces you to engage your core and prevents the slumping that often happens in seated shots. Always point your knees and toes slightly toward the light source to catch the most flattering highlights.
Perfecting Facial Angles and Eye Contact
Bring life to your eyes by using the “smize” technique, which involves tightening the lower eyelids slightly without forcing a wide grin. Most people have a preferred “good side” where their jawline appears more symmetrical; use the live monitor to find yours. For a more natural look, try the “Look Away, Look Back” method. Look toward your family members or the floor, then quickly look back at the lens. This captures a more candid, fresh expression. Practicing these techniques in a private self-photo studio allows you to see the results in real-time, making it easier to refine your posture before the final click.
Occasion-Specific Posing: From Corporate to Traditional Hanbok
The way you position your body should always align with the intended message of your photograph. While family portrait poses often prioritize warmth and physical connection, a professional portrait requires a foundation of authority and engagement. For group shots, avoid standing in a single, flat row. Instead, create visual interest by layering heights. Use stools to seat some members while others stand, and ensure everyone is leaning slightly inward toward the center of the group. This creates a tight, cohesive unit that looks organized rather than accidental.
Graduation photography presents a unique challenge because the heavy fabric of the gown can easily hide your silhouette. To avoid looking boxy, stand at a slight angle and place one hand on your hip or hold your diploma to create a visible bend in the arm. This breaks up the flat surface of the gown and defines your waist. Keep your graduation cap level; tilting it too far back can cause awkward shadows across your forehead and hide your eyes from the light.
Corporate and Professional Headshots
Engagement is key for a successful business profile. Use the “Power Lean” by shifting your upper body slightly toward the camera lens. This movement signals confidence and interest to the viewer. When it comes to hand placement, folding your arms can project strength, but it may also appear closed off. A more modern approach is to rest your hands naturally at your sides or gently clasp them in front. An approachable expert look for LinkedIn is defined by a relaxed jawline, a warm and genuine eye expression, and a subtle forward lean that signals active engagement with the viewer. If you’re looking to refresh your brand, check out this Professional corporate headshot Singapore guide for more industry-specific tips.
Themed Shoots: Hanbok and Pre-Wedding
Cultural garments like the Hanbok require a specialized approach to highlight the garment’s flow. Since the skirt is voluminous, use your hands to gently lift or hold the fabric to show movement and prevent the dress from looking static. Keep your posture upright and elegant, as the traditional aesthetic favors grace over sharp angles. For couples, transition away from stiff standing positions toward romantic interactions. The “Almost Kiss” or the “Forehead Touch” creates an intimate, cinematic feel that looks far more authentic than staring directly into the lens. To explore styling options for your session, read our guide on Traditional Hanbok rental in Singapore to ensure you’re fully prepared for your shoot.
Mastering the Remote: Posing in a Self-Photo Studio
Mastering the remote is the final hurdle in achieving professional results without a photographer. In a self-photo studio, you act as the director. The “Click and Hide” method is essential for a polished look. Click the button, then immediately tuck the remote behind your thigh or hide it in your palm. This ensures the focus remains on your family portrait poses and not the technical gear. If you’re feeling creative, you can even use the cord as a leading line, wrapping it around your hand for a modern, “behind-the-scenes” aesthetic.
Timing is everything. Don’t rush the process. Wait at least three seconds between shots. This gives the studio lights time to recycle and allows you to reset your expression as we discussed in the opening section. Most studios have a specific mark on the floor. Stay on this mark to ensure you stay within the optimal lighting zone. Moving too far forward or back can cause harsh shadows or overexposure. Staying centered ensures the high-end equipment works for you, not against you, creating a seamless experience from start to finish.
Technical Tips for Self-Portraiture
Full-body shots often require a countdown timer. Set a short delay so you can drop the remote and pick up a graduation scroll or a bouquet. This keeps your hands looking natural and purposeful. Always check the live monitor to ensure you’re in focus; staying on your mark is the easiest way to guarantee a sharp image every time. Managing the remote while holding props takes a bit of practice, but the privacy of the space means you can take as many tries as you need without feeling rushed or judged.
Dynamic Movement and Candid Self-Photos
The “Walk Toward the Camera” technique creates an effortless, airy look. Take small, slow steps while clicking the remote at a steady pace. Capturing hair flips or minor clothing adjustments can lead to beautiful candid moments that feel more authentic than a static pose. Self-photo packages are the perfect environment to try risky or playful family portrait poses that you might feel too shy to attempt in a traditional setting. This freedom often results in the most cherished photos of the entire session.
Ready to put these techniques to the test? Book your session at PhotoNow’s premium self-photo studio and take control of your next shoot.
Your Posing Practice: Why PhotoNow is the Perfect Studio
PhotoNow offers the ideal environment to refine the techniques we’ve discussed. While understanding the mechanics of weight distribution and facial angles is vital, the environment in which you practice these family portrait poses determines the final quality of your memories. Our studio bridges the gap between a casual DIY setup and a high-pressure professional session. You get the benefit of professional-grade lighting and backdrops; however, you maintain the total privacy required to experiment without hesitation. This “no-fuss” approach ensures that your comfort remains the priority throughout the entire experience.
Our range of services is designed to meet every milestone. Whether you’re booking a Basic Self-Photo Package for a quick update or a specialized Maternity photoshoot, the setup remains consistently high-quality. We provide a space where you can take the lead. This ensures that your final images reflect your personality rather than a photographer’s specific style. Preparing for your session is straightforward. Simply arrive with your favorite outfits and a few of the poses you’ve mastered from this guide. Our team has pre-configured everything to ensure a stress-free experience from the moment you step inside.
Everything You Need in One Place
We simplify the creative process by providing all the necessary tools on-site. From our Hanbok rental for photoshoot options to a variety of themed props, we’ve anticipated your needs to help you achieve a polished look. Our professional equipment is calibrated for optimal results, so you don’t need to worry about technical settings or lighting adjustments. If you’re still deciding on the right location for your needs, our Family photo studio Singapore guide offers deeper insights into what makes a space truly effective for your family.
Booking Your Session
Securing your time in our studio is a seamless, methodical process. We offer dedicated slots for our Graduation Photography Package, Corporate Headshot Package, and Pre wedding photo shoot sessions. Each booking ensures you have full access to our private pods and live-view monitors. This real-time feedback is essential for perfecting your posture and expressions. For those celebrating academic achievements, our Graduation photo studio Singapore resource provides specific advice for milestone portraits.
Ready to put these tips to the test? Book your professional self-photo session at PhotoNow today!
Step Into the Frame with Confidence
Mastering your favorite family portrait poses is about more than just looking good; it’s about feeling comfortable in your own skin. By applying simple geometric rules like shifting your weight and creating negative space with your arms, you can instantly transform a stiff posture into a natural silhouette. These professional techniques ensure that you look your best while capturing genuine moments that last a lifetime. You’ve already learned how to handle the remote and overcome camera shyness, so the hardest part is already behind you.
A successful session relies on the right environment. Our private studio experience provides a professional setting where you can practice these tips without distractions. With professional lighting and high-resolution equipment at your fingertips, every angle is polished to perfection. We offer specialized Hanbok and Graduation packages to ensure your specific needs are met with ease. You don’t need to be a model to achieve stunning results; you just need the right space and a few repeatable steps. Explore our Basic Self-Photo Packages and start posing like a pro. We’re ready to help you capture your best self.
Frequently Asked Questions
What should I do with my hands during a photoshoot?
Give your hands a specific task to prevent them from looking awkward or stiff. You can gently hold a prop, place a hand on your hip to define your waist, or lightly touch your clothing or hair. If you’re standing with a partner, placing a hand on their shoulder or arm creates a warm connection. Avoid clenching your fists; keeping your fingers relaxed and slightly separated ensures a soft, natural appearance.
How can I look thinner in my studio portraits?
Angle your body 45 degrees away from the lens rather than facing it directly. This creates a more slender profile by adding depth to your frame. Shift your weight to your back leg to naturally drop your front hip and create a more flattering line. Pushing your chin slightly forward and down sharpens your jawline, while leaving space between your arms and torso helps define your waistline effectively.
Can I bring my own props to a self-photo studio in Singapore?
Most self-photo studios in Singapore encourage you to bring personal props to customize your session. Items like balloons, customized signs, or even meaningful keepsakes are often welcome, though you should check the specific studio’s policy regarding pets or messy items like confetti. Bringing your own props is an excellent way to add a personal touch to your family portrait poses and helps tell a unique story.
What is the best pose for a professional corporate headshot?
The most effective corporate pose involves turning your body slightly and leaning your chest toward the camera. This “power lean” signals engagement and confidence to anyone viewing your professional profile. Keep your shoulders relaxed and your chin level to maintain an approachable yet authoritative look. Whether you choose to cross your arms or keep them at your sides, ensure your posture remains upright to project professionalism.
How do I pose for a graduation photo with my family?
Create visual interest by layering different heights within the group. The graduate should typically be centered, with family members standing or sitting at different levels using studio stools. When coordinating these family portrait poses, ensure the graduate angles their body to break up the bulk of the graduation gown. Family members can place hands on the graduate’s shoulders or arms to show support and create a cohesive, bonded appearance.
Should I look directly at the camera or away for a more natural look?
Use a mix of both styles to ensure your final gallery has plenty of variety. Looking directly at the lens creates a strong, personal connection with the viewer, which is ideal for formal portraits. Looking away or interacting with others in the frame produces a candid, documentary feel. Try the “look down and look up” method to capture a fresh, spontaneous expression just as you make eye contact with the camera.
How do I hide the remote shutter in self-photo studio pictures?
Hide the remote shutter by tucking it into your palm or behind your leg immediately after pressing the button. If the remote has a short delay, you have a split second to move it out of the frame before the shutter clicks. Another option is to use the studio’s countdown timer, which allows you to set the remote down entirely before the photo is taken. This ensures the technical equipment doesn’t distract from your posture.
Is it better to stand or sit for a maternity photoshoot?
A combination of standing and seated poses offers the best variety for a maternity session. Standing poses are excellent for highlighting the silhouette of your bump, especially when you place your hands above and below the belly to frame it. Seated poses on a stool or the floor can feel more intimate and relaxed. Sitting also allows you to rest and change your angles comfortably, ensuring you feel supported throughout the shoot.
Recent Comments