
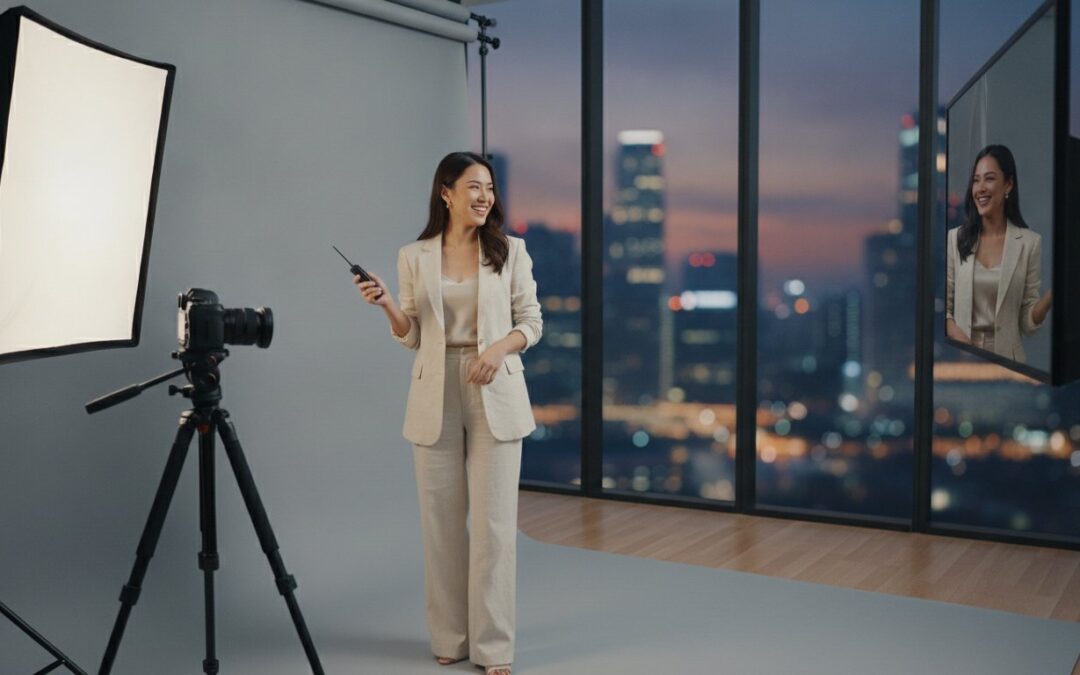
What if the most talented photographer for your next milestone portrait is actually you? Most people find it difficult to relax when a stranger is watching them through a lens, often leading to stiff poses and forced smiles. It’s a common frustration to worry about harsh lighting or feeling unsure about what to do with your hands. By using these expert self photo studio tips, you can eliminate the pressure of a traditional shoot and focus on capturing your most authentic self in a private, professional setting.
This guide provides a comprehensive roadmap to mastering the art of the private portrait. We’ll show you how to utilize high-end studio equipment to achieve a polished look without any technical stress. You’ll discover how to select the perfect outfits, choose props that enhance your story, and use posing techniques that feel natural rather than staged. Whether you’re preparing for a graduation, a corporate update, or a fun session with friends, these insights ensure your final images are both professional and uniquely yours.
Key Takeaways
- Learn how to coordinate your wardrobe with studio backdrops and apply professional grooming techniques to ensure you look polished under high-end lighting.
- Master the “Triangle Method” and the three-second rule to create dynamic, flattering poses that eliminate the awkwardness of being in front of a camera.
- Explore essential self photo studio tips for identifying the “Sweet Spot” of professional lighting to achieve a high-quality, cinematic finish for every shot.
- Discover how to navigate themed sessions, such as traditional Hanbok or graduation shoots, to create sophisticated portraits that celebrate significant life milestones.
- Gain the confidence to direct your own session in a private, stress-free environment that prioritizes your comfort and creative control.
Preparing for Your Session: Before You Step Into the Studio
Modern self-photography has evolved from the long history of self-portraiture into a sophisticated studio experience. To get the best results, your work starts before you arrive. Success in a private studio depends on how well you’ve anticipated the interaction between your styling and the professional equipment. Following a few specific self photo studio tips during your preparation phase ensures that you maximize your booking time and walk away with high-end results.
Planning your attire around the studio’s backdrop is a foundational step for creating visual impact. If the backdrop is dark, wearing light or vibrant colors creates a sharp contrast that draws focus to your face. Conversely, if you’re aiming for a moody, low-key look, darker tones can help you blend into the shadows for a cinematic effect. This intentional choice prevents you from looking “washed out” or disappearing into the background, ensuring you remain the focal point of every frame.
Professional lighting is unforgiving with skin shine. While a dewy makeup finish is popular for daily wear, it often translates as oily skin under intense studio strobes. Opt for matte foundations and powders to maintain a smooth, professional appearance. This choice allows the studio lights to sculpt your features correctly rather than creating distracting highlights on your forehead or cheeks. It’s a simple adjustment that significantly reduces the need for post-session editing.
Arriving 10 minutes early is more than just a courtesy; it’s a strategic move to cool down from the Singapore heat and review your vision. Use your phone to curate a quick mood board of poses or lighting styles you admire before the timer starts. This prevents that “blank slate” feeling when you first step into the room, allowing you to move through your session with confidence and purpose.
Choosing the Right Outfit and Fabrics
Technical precision matters when selecting your clothes for a studio environment. Avoid very fine stripes or intricate patterns, as these can cause “moiré” effects. This is a visual distortion that happens when a professional camera sensor struggles with repetitive textures, resulting in strange wavy lines in your photos. Solid colors are usually the safest choice for a clean, timeless aesthetic. If you’re coming with a group, try to coordinate a color palette rather than wearing identical outfits. Mixing different shades of the same color or using complementary tones looks more natural and sophisticated than a perfectly matched look.
The Pre-Shoot Checklist for Singapore Weather
Managing the local humidity is a common challenge for those seeking self photo studio tips that actually work. Before you enter the air-conditioned studio, take a moment to fix any flyaway hair or blot excess moisture from your skin. It’s helpful to prepare a small bag with essentials like a comb, oil-blotting sheets, and a spare lipstick. For a detailed list of what to pack, check out these 5 Essential Things to Bring to a Self-Photo Studio to ensure you’re fully equipped for a successful and stress-free session.
Mastering the Shutter: Strategic Posing Tips for Self-Photography
Stepping into a private studio removes the pressure of an audience, but it requires you to be your own director. Mastering the shutter is about more than just clicking a button; it’s about timing and spatial awareness. These strategic self photo studio tips will help you transition from feeling stiff to looking like a seasoned professional in minutes. When you control the remote, you have the freedom to experiment until you find the angles that work best for you.
One of the most effective ways to improve your silhouette is the Triangle Method. By creating angles with your arms and legs, such as placing a hand on a hip or crossing your ankles, you avoid a boxy appearance. This technique adds depth and creates a slimmer, more dynamic profile. Creating visual interest often comes down to fundamental portrait composition techniques that guide the viewer’s eye through the frame and emphasize your best features.
Timing is equally critical for a sharp image. Many beginners make the mistake of moving too quickly, which often results in motion blur or awkward mid-pose captures. Use the three-second rule: press the remote, strike your pose, and hold it firmly until you see the flash fire. To keep the shot looking professional, you’ll need to hide the remote shutter. You can easily conceal it in the palm of your hand, tuck it behind a prop, or hide it within the folds of your clothing to maintain the illusion of a traditional photoshoot.
Your gaze also dictates the mood of the final portrait. While it’s tempting to look at the live monitor to check your hair, looking directly into the camera lens creates a stronger connection with the viewer. Try alternating between the two. Look at the monitor to find your angle and check your posture, then shift your eyes to the lens just before you click the shutter for that focused, intentional look.
Dynamic Movement vs. Static Poses
If static poses feel too formal, try the “Slow-Motion Walk” technique. Take small, deliberate steps toward or across the camera to capture a sense of candid movement. This works best when you give your hands a “job” to do. Holding a stool or a bouquet of flowers gives you a natural reason to adjust your posture without feeling forced. When posing in groups of three or more, vary your heights. Have one person sit while others stand to create a balanced, professional hierarchy in the frame.
Posing for Milestone Portraits
For those seeking corporate headshots, focus on your “power angles.” Tilt your chin slightly down and push it forward to define the jawline while keeping your shoulders at a 45-degree angle to the lens. This creates a look that’s both confident and approachable. If you’re here for graduation photography, use your hands to highlight your scroll or the embroidery on your gown. These subtle adjustments ensure your milestone photos look sophisticated. If you’re ready to put these techniques into practice, you can book your private session and start creating.
Themed Shoots and Styling: From Hanboks to Graduation
Themed photography is the standout trend in Singapore’s creative scene for 2026. People are looking for ways to celebrate their heritage and milestones with more than just a standard portrait. A private studio offers the ideal environment for cultural appreciation shoots. It allows you to take the time needed to adjust intricate garments without feeling rushed by a photographer or onlookers. This privacy is essential when you want to experiment with different looks while maintaining a high level of comfort.
Capturing the grace of a Korean Hanbok requires an understanding of its unique silhouette. Unlike modern western clothing, the Hanbok relies on volume and flow. You should keep your back straight and hands gently folded at the waist to respect the traditional form. For academic milestones, managing a graduation gown is often a technical hurdle. Ensure your hood is pinned securely and your cap is level to prevent it from casting dark shadows over your face. Applying these self photo studio tips ensures your milestone photos reflect the significance of the occasion with professional clarity.
Traditional Hanbok Photoshoot Tips
Selecting the right colors is essential for a balanced image. Choose Hanbok tones that contrast well with the studio’s backdrop to ensure you stand out rather than blending in. When posing, remember that small hand movements can change the entire mood of the portrait. Avoid over-cluttering the frame with too many accessories; a single traditional hairpiece or a simple fan is often enough to add authenticity. Because the garment is structural, you can utilize professional lighting patterns to highlight the delicate textures of the silk and embroidery, giving your photos a premium, high-fashion finish.
Milestone and Family Styling
Creating a cohesive look for a family photoshoot doesn’t mean everyone has to wear matching outfits. Instead, pick a color palette of three or four complementary shades to create a timeless and sophisticated aesthetic. The private room setting is a significant advantage for parents. It provides a safe, enclosed space where kids and pets can relax, leading to more genuine smiles and fewer distractions during the session. Whether you’re celebrating a pregnancy or a wedding anniversary, the privacy allows for intimate moments that feel far more personal than a public session. Using these self photo studio tips helps you capture the real connection between family members in a stress-free environment.
Technical Secrets: Getting the Professional Studio Look
Most people view self-photography as a casual activity, yet the equipment in a professional setting is designed for high-end results. Achieving a magazine-quality finish depends on your ability to work with the studio’s technical setup. These self photo studio tips focus on the mechanics of the room, helping you transition from simple snapshots to intentional portraits. While a standard photobooth flash often produces flat, harsh light with deep shadows, professional studio lighting utilizes high-output strobes and modifiers to wrap light around the subject for a soft, polished finish.
Understanding the “Sweet Spot” is your first technical priority. This is the specific area on the floor where the lighting is most balanced and the camera’s focus is sharpest. If you stand too far back, you might lose the flattering effects of the softboxes, which are designed to diffuse light and minimize skin imperfections. If you move too far forward, you risk falling out of the camera’s pre-set focus range. Finding this balance ensures every shot is crisp and well-lit without requiring constant adjustments.
You also have the choice between high-key and low-key aesthetics. High-key portraits are bright and airy, often using white or light grey backdrops to create a cheerful, modern vibe. Low-key portraits use darker backgrounds and more dramatic shadows to create a moody, sophisticated look. Your choice should align with the story you want to tell, whether it’s a professional update or a creative personal project. Camera height also plays a role; a lens positioned at eye level is generally the most flattering, as it maintains natural proportions and prevents an exaggerated perspective.
Working with the Monitor and Remote
The live monitor acts as your digital mirror. Use it to check your alignment and hair in real-time, but remember to look back at the lens before clicking the shutter. Establishing a rhythm is the secret to a high “keep” rate. Don’t spam the remote button; give the studio flashes a second to recycle between shots to ensure consistent exposure. If the remote feels laggy, ensure you’re pointing it toward the receiver and holding the button firmly for a clear signal.
Backdrop and Lighting Synergy
Creating depth is essential for a professional look. The “Step Forward” trick involves standing a few feet away from the backdrop rather than leaning against it. This separation creates a sense of three-dimensional space and prevents harsh shadows from falling directly onto the wall behind you. You can also experiment with monochrome settings for a timeless feel, or stick to color to highlight the vibrant tones of your styling. If you’re ready to experience a professional setup, book your session at PhotoNow and see the difference that high-end equipment makes.
Why PhotoNow is Singapore’s Premier Self-Photo Experience
Choosing the right venue is the final piece of the puzzle after mastering your poses and styling. PhotoNow at The Centrepoint provides a professional studio environment that functions as a “no-judge zone.” This privacy is exactly why even the most camera-shy individuals find themselves thriving during our sessions. Without the pressure of a photographer watching your every move, you’re free to experiment with the self photo studio tips discussed in this guide, resulting in portraits that feel authentic and unforced.
The experience at PhotoNow goes far beyond the simple click of a shutter. Every package is designed to provide high-value outcomes, including both high-resolution digital copies and professional physical prints. This ensures that your memories aren’t just stuck on a hard drive but are ready to be displayed in your home or shared with loved ones. To turn your full digital gallery into a custom physical keepsake, you can visit Easy photo book. The seamless process from booking to the final print delivery is built around efficiency and quality, reflecting a standard that suits both personal milestones and professional needs.
Convenience at The Centrepoint
Located in the heart of Orchard Road, our studio offers unmatched accessibility for residents and visitors alike. This central location makes it incredibly easy to coordinate group sessions or family gatherings. Many clients find that the proximity to world-class dining at The Centrepoint makes it the perfect starting point for a day of celebration. Our professional-grade equipment guarantees that every shot is social-media-ready, offering a smooth transition from self-photo sessions to high-end portrait results that rival traditional photography services.
Booking Your Milestone Session
Getting started is a straightforward process designed to respect your time. You can begin by exploring the Basic Self-Photo Package, which is perfect for casual fun with friends or quick profile updates. For those celebrating more significant life events, we offer specialized upgrades for weddings, graduations, and corporate milestones. These packages ensure you have the specific backdrops and time required to capture the gravity of the occasion. By applying these self photo studio tips in a space designed for your comfort, you’re guaranteed a stress-free experience with professional results. Book your private studio experience today and take control of your perfect portrait.
Take Control of Your Perfect Portrait
Mastering your own portraiture is a rewarding experience that combines complete creative freedom with professional-grade quality. By applying these practical self photo studio tips, you’ve learned how to navigate technical lighting patterns, select flattering fabrics, and strike natural poses in a private setting. Whether you’re celebrating an academic milestone, updating your corporate image, or exploring traditional Hanbok styling, the right environment makes all the difference.
PhotoNow provides the professional studio lighting and private sessions at The Centrepoint you need to achieve high-end results without the stress. It’s time to step away from awkward public shoots and embrace a “no-judge zone” where your authenticity can truly shine. With our traditional Hanbok and graduation rentals available on-site, every element required for a stunning milestone portrait is ready and waiting for you.
Ready to see yourself in a new light? Book Your Private Self-Photo Session at PhotoNow Today! and discover how effortless professional photography becomes when you’re the one in charge. We can’t wait to see the beautiful portraits you’ll create in our studio.
Frequently Asked Questions
Is a self-photo studio better than a professional photographer?
A self-photo studio is an excellent alternative for those who prioritize privacy and comfort over external direction. While a professional photographer offers expert guidance, a self-studio allows you to relax and capture genuine moments without an audience. It’s particularly effective for individuals who feel stiff in traditional settings. This private environment ensures you can experiment freely with different expressions until you achieve the perfect result.
Can I bring my own props to a self-photo studio in Singapore?
Yes, you are welcome to bring your own props to enhance your session. Personal items such as graduation scrolls, anniversary flowers, or even well-behaved pets help customize your portraits. Using your own props is one of the best self photo studio tips for making your photos feel unique. These items also provide a natural way to position your hands, which often helps reduce the awkwardness of posing for the camera.
How many people can fit in a self-photo studio room?
Capacity varies depending on the room size you choose for your session. Regular rooms at PhotoNow comfortably accommodate one to five people, which is ideal for solo sessions or small groups. For larger gatherings like family reunions or corporate teams, large rooms are available for up to 12 participants. This flexibility ensures that everyone can fit into the frame comfortably while enjoying the professional lighting setup.
What should I do if I don’t know how to pose?
You don’t need to be a professional model to get great results in a private studio. Use the live monitor to check your alignment in real-time and follow the “Triangle Method” by placing hands on hips or crossing your legs. Referencing a pre-saved mood board on your phone can also give you instant inspiration. Taking a few test shots at the start of your session helps you identify your best angles quickly.
Are digital copies included in self-photo packages?
Yes, all digital copies are typically included in our standard packages. This means you receive every photo taken during your session, allowing you to choose the best frames for your social media or personal archives. Having access to the full digital gallery provides great value and ensures you don’t have to leave any favorite moments behind. Some packages also include physical 4R prints and framed photos for your home.
Can I change outfits during my self-photo session?
You can definitely change outfits during your session to capture different looks. To maximize your shooting time, it’s best to arrive 10 minutes early so you can prepare your wardrobe beforehand. Quick changes work best to ensure the majority of your booking is spent in front of the lens. This flexibility allows you to transition from a casual style to a more formal academic or corporate aesthetic seamlessly.
Is there a time limit for the photoshoot?
Yes, each session has a specific time limit ranging from 15 to 60 minutes depending on your chosen package. Most clients find that 30 minutes provides the perfect balance for multiple poses and an outfit change. Being organized is one of the most important self photo studio tips for managing your time effectively. Planning your sequence of shots in advance ensures that you don’t feel rushed and walk away with a diverse gallery of images.
Do I need to be tech-savvy to use the remote and camera?
You don’t need any technical expertise to enjoy a professional photoshoot. Our staff pre-configures the professional camera, lighting, and focus before you enter the room. Your only task is to stand in the “Sweet Spot” and press a simple handheld remote shutter. This user-friendly setup is designed to be accessible for everyone, from young children to seniors, ensuring a smooth and stress-free experience for all.
Recent Comments